
So, when I started getting into Laravel, I was using Laravel 5.3 which has plenty of cool features that made me fall in love with the framework. One of those features that I absolutely love is Laravel’s notification system. The Laravel notification system is quite versatile. In addition to support for sending email, Laravel provides support for sending notifications across a variety of delivery channels, including mail, SMS (via Nexmo), and Slack. Notifications may also be stored in a database so they may be displayed in your web interface. I think that it makes total sense to group all user communication into a single notification system that you can be customize as you like. The notification system allows you to send various types of notifications, which range from email messages to text messages to slack messages. All from a convenient notification wrapper. I searched everywhere online trying to find how to make it all work and I would not find anything other than this excellent Laracast. So after I understood how it all works, I decided to write this short tutorial for anybody else trying to figure out how Laravel’s notification system works.
Introduction to Laravel Notification
The notification component is new as of Laravel 5.3. It allows you to take any event in your application and notify the user in multiple forms, all from a single notification system. This notification could be an email, text message, slack channel or any other notification system available. And if you want, you can define your own notification channel. You can even throw the notification into a table and do whatever you want with the notification later on.
Let’s get started
In this tutorial, we will create a simple notification system that sends email notifications to users in our database. You can see the live tutorial here and here it is on GitHub. My database will consist of 5 users. All these users will be Jedis with lightsabers. There will be a lightsaber status page for checking the status of a given Jedi’s lightsaber. This page will also fire off notifications in the form of emails to let the Jedi know if their Jedi is on or off. So lets get started. We’ll start with a brand new installation of Laravel using composer:
[ph]composer create-project –prefer-dist laravel/laravel notifications[/php]
Once the project is created, we should modify the .env file. Two things need to be changed in this file: the database connection and the mail driver. Change the database connection to your appropriate settings
DB_CONNECTION=mysql
DB_HOST=127.0.0.1
DB_PORT=3306
DB_DATABASE=notifications
DB_USERNAME=mysuperdbusername
DB_PASSWORD=myawesomedbpassword
Change the mail driver information to your appropriate email provider. In my case, I am using mailtrap. They offer the perfect API for testing emails in your application. The best part is that their starter package is free and it does everything that you need to test emails on any application.
MAIL_DRIVER=smtp
MAIL_HOST=mailtrap.io
MAIL_PORT=2525
MAIL_USERNAME=8e587c5er34r1
MAIL_PASSWORD=cd104324pd7f
MAIL_ENCRYPTION=null
Now let’s run the migrations, but we before we do so, we will update the users model to include an extra field called is_lightsaber_on which will be a Boolean flag. Remember, our users are Jedis and they will need to know if their lightsaber is active or not. The following is the up() method of the users migration:
    public function up()
    {
        Schema::create('users', function (Blueprint $table) {
            $table->increments('id');
            $table->string('name');
            $table->string('email')->unique();
            $table->string('level');
            $table->boolean('is_lightsaber_on');
            $table->rememberToken();
            $table->timestamps();
        });
    }
Next, we will seed our database with the 5 Users by creating an additional migration file called seed_users_table
php artisan make:migration seed_users_table </code></pre>
This will create a new file with the date at the front of it. In my case, the file is: 2016_11_13_180012_seed_users_table. One important note: seeding a database with migrations is a bad idea. But it helps me quickly setup the basics so that I can quickly jump into the notifications part of the tutorial. Below is the contents of the file:
class SeedUsersTable extends Migration
{
    /**
     * Run the migrations.
     *
     * @return void
     */
    public function up()
    {
		$now = date('Y-m-d H:i:s');

        // create all of our users (all jedis of course...)
		DB::table('users')->insert(
		array(
				array(
						'name' => 'Luke Skywalker',
						'email' => 'luke@jedirebels.com',
						'level'  => 'Jedi in training',
						'is_lightsaber_on' => '1',
						'created_at' => $now,
						'updated_at' => $now,
				),
				array(
						'name' => 'Yoda',
						'email' => 'yoda@jedicouncil.org',
						'level'  => 'Jedi Master',
						'is_lightsaber_on' => '1',
						'created_at' => $now,
						'updated_at' => $now,
				),
				array(
						'name' => 'Mace Wondu',
						'email' => 'mace@jedicouncil.org',
						'level'  => 'Jedi Master',
						'is_lightsaber_on' => '0',
						'created_at' => $now,
                'updated_at' => $now,
				),
				array(
						'name' => 'Anakin Skywalkder',
						'email' => 'vader@theevilempire.org',
						'level'  => 'Sith Lord',
						'is_lightsaber_on' => '0',
						'created_at' => $now,
						'updated_at' => $now,
				),
				array(
						'name' => 'Obi Wan Kenobi',
						'email' => 'ken@obiwancan.com',
						'level'  => 'Master jedi',
						'is_lightsaber_on' => '1',
						'created_at' => $now,
						'updated_at' => $now,
				),
		));
    }

    /**
     * Reverse the migrations.
     *
     * @return void
     */
    public function down()
    {
        // delete all of our created users
		DB::table('users')->delete();
    }
}
Once again: What I am doing above is really not good practice. Migrations aren’t really designed to import data into the database; their primary job is to modify the database structure itself, and it should remain that way.
Now, we can run the migrations by running the command:
php artisan migrate
Now, we can update the users model and create the users controller with the following code:
php artisan make:controller UserController
Below is the full code for our users controller. Our controller contains the index() to show all users and the toggle() method which turns on/off the lightsave. Finally, there is the notify() function which is empty for the moment since we will define it later using notifications. Here is the contents of the file:
class UserController extends Controller
{
    // this pae will list all of the jedis in our database
	function index(){
		// get all the jedis
        $jedis = User::all();

		return view('jedis.index')->with('jedis', $jedis);
	}

	function notifyJedi($id){
		// this is where the notification logic will be implemented
        $jedi = User::findOrFail($id);
	}

	function getLightsaberStatus($id){

		 // get the jedi and toggle his/her lightsaber
        $jedi = User::findOrFail($id);


		if($jedi->is_lightsaber_on){
			return redirect()->route('home')
				->with('message', 'The lighsaber for '.$jedi->name.' is currently turned ON')
				->with('status', 'info');
		}else{
			return redirect()->route('home')
                ->with('message', 'The lighsaber for '.$jedi->name.' is currently turned OFF')
				->with('status', 'info');
		}

	}

	function toggleLightsaberStatus($id){

		 // get the jedi and toggle his/her lightsaber
        $jedi = User::findOrFail($id);

		$jedi->is_lightsaber_on = !$jedi->is_lightsaber_on;
		$jedi->save();

		if($jedi->is_lightsaber_on){
			return redirect()->route('home')
				->with('message', 'The lighsaber for '.$jedi->name.' is now turned ON')
				->with('status', 'success');
		}else{
			return redirect()->route('home')
                ->with('message', 'The lighsaber for '.$jedi->name.' is now turned OFF')
				->with('status', 'danger');
		}

	}
}
The only method requiring a view is the index() method and the view will be created in views/jedis/index.blade.php. Here is what the file contains:
<!-- app/views/jedis/index.blade.php -->

<!DOCTYPE html>
<html>
<head>
    <title>Lightsaber Notifier App</title>
    <link rel="stylesheet" href="//netdna.bootstrapcdn.com/bootstrap/3.0.0/css/bootstrap.min.css">
</head>
<body>
<div class="container">

<nav class="navbar navbar-inverse">
    <div class="navbar-header">
        <a class="navbar-brand" href="{{ URL::to('/') }}">Home</a>
    </div>

</nav>

<h1>Jedis Database</h1>

<!-- will be used to show any messages -->
@if (Session::has('message'))
    <div class="alert alert-{{ Session::get('status') }}">{{ Session::get('message') }}</div>
@endif

<table class="table table-striped table-bordered">
    <thead>
        <tr>
            <td>ID</td>
            <td>Name</td>
            <td>Email</td>
            <td>Jedi Level</td>
            <td>Actions</td>
        </tr>
    </thead>
    <tbody>
    @foreach($jedis as $key => $jedi)
        <tr>
            <td>{{ $jedi->id }}</td>
            <td>{{ $jedi->name }}</td>
            <td>{{ $jedi->email }}</td>
            <td>{{ $jedi->level }}</td>

            <!-- actions to take -->
            <td>
				<!-- edit this nerd (uses the edit method found at GET /jedis/{id}/edit -->
                <a class="btn btn-small btn-success" href="{{ URL::to('status/' . $jedi->id ) }}">Get Lightsaber Status</a>

                <!-- edit this nerd (uses the edit method found at GET /jedis/{id}/edit -->
                <a class="btn btn-small btn-primary" href="{{ URL::to('toggle/' . $jedi->id ) }}">Toggle Lightsaber</a>

				<!-- show the jedi (uses the show method found at GET /jedis/{id} -->
                <a class="btn btn-small btn-danger" href="{{ URL::to('notify/' . $jedi->id) }}">Notify this Jedi</a>

            </td>
        </tr>
    @endforeach
    </tbody>
</table>

</div>
</body>
</html>
For the moment, let’s update our routes so that we can see what we been working on. Here is the content of the web/routes.php file:
/*
|--------------------------------------------------------------------------
| Web Routes
|--------------------------------------------------------------------------
|
| This file is where you may define all of the routes that are handled
| by your application. Just tell Laravel the URIs it should respond
| to using a Closure or controller method. Build something great!
|
*/

Route::get('/',         ['as' => 'home',   'uses' => 'UserController@index']);
Route::get('toggle/{id}',         ['as' => 'toggle',   'uses' => 'UserController@toggleLightsaberStatus']);
Route::get('notify/{id}',         ['as' => 'notify',   'uses' => 'UserController@notifyJedi']);
And we can run the command:
php artisan route:list
To view all the routes currently setup for the application. This is what it would should look like:

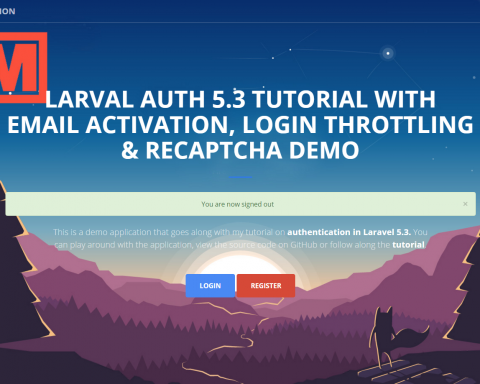
All these routes are active and ready to go, so you should be able to load it up on your browser and see the following screen:
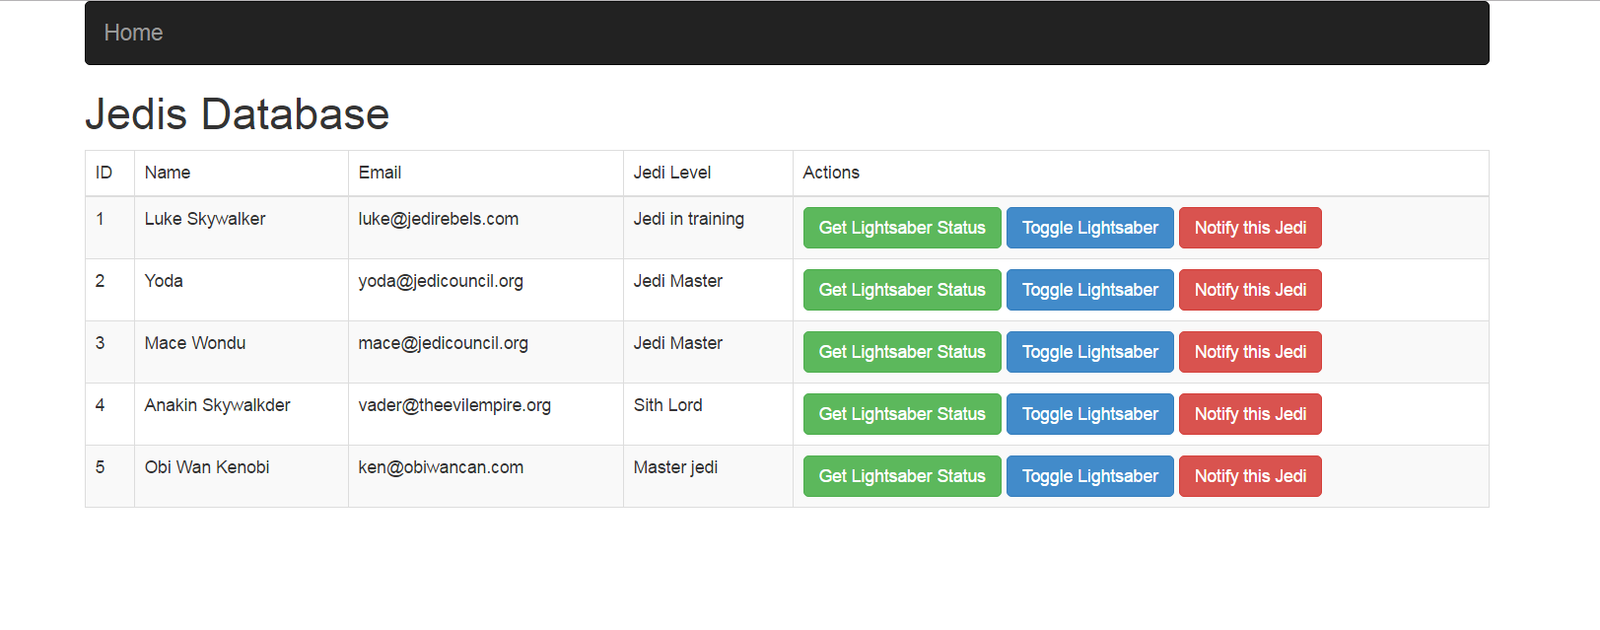
You should also be able to click on the first two buttons to get a Jedi’s lightsaber status and toggle it on or off.

Create the Notification
So now, we are now ready to setup the notification system. We will focus on the most basic form of notification: an email notification. In Laravel 5.3, there is a new trait called Notifiable that we will use. This trait can be used on any model. You simply have to make sure that the model uses the trait and then you can use the notify() method. In the case of my users controller, I will use the following line in my controller:
$user->notify();
To make a notification, we simply use artisan. In our case, we want to make a notification about the status of the lightsaber of our jedis, so I will create a notification called LightsaberUpdated. Here is the artisan command
php artisan make:notification LightsaberUpdated
After running this, you will now notice a notifications folder inside the App folder and this new folder will contain our new notification. If you open the file, you will see that it comes pre-installed with 3 mehtods along with the constructor: via(), toMail() and toArray().
A notification has different ways to send the message depending on the medium. The toMail() method defines how we should send the message for an email while the toArray defines how to send the message to a log file or database in the form of an array. By default, Laravel will give you a basic template of what the email version of the notification should look inside the toMail() method. Here is what it looks like right out of the box:
    public function toMail($notifiable)
    {
        return (new MailMessage)
                    ->line('The introduction to the notification.')
                    ->action('Notification Action', 'https://laravel.com')
                    ->line('Thank you for using our application!');
    }
What you can see right away is that Laravel gives you the possibility to tweek the notification message based on the medium. So the email version may be different from the text message version, which may be different from the slack version. This is ultra convenient for many of today’s applicatinos. For example, this is useful for an application that sends activation codes through various channels. So for example, you may only send the text message notification if the user has a valid phone number on file or only send the notification if you know that the user’s email address is valid.
The via() method defines all the channels that the nofication should use. By default, it is setup as ‘mail’ and we will keep it as-is
    public function via($notifiable)
    {
        return ['mail'];
    }
Our constructor should know which user we are sending the notification to. So, I am going to add the user as a parameter for the constructor.
 public function __construct(User $jedi)
    {
        $this->jedi = $jedi;
    }
We are now ready to notify our jedis about the status of their lightsaber. Let’s go back to our notifyJedi() method in the UseController and send the LightsaberUpdated notification via:
        $jedi = User::findOrFail($id);
	$jedi->notify(new LightsaberUpdated($jedi));
So our full notifyJedi method now looks like so:
	function notifyJedi($id){

        $jedi = User::findOrFail($id);
		$jedi->notify(new LightsaberUpdated($jedi));

		if($jedi->is_lightsaber_on){
			return redirect()->route('home')
				->with('message', 'We have notified '.$jedi->name.' that their lightsaber is currently turned ON')
				->with('status', 'info');
		}else{
			return redirect()->route('home')
                ->with('message', 'We have notified '.$jedi->name.' that their lightsaber is currently turned OFF')
				->with('status', 'info');
		}
	}
That’s all there is to it and this method will actually work and fire off the template notification defined in our LightsaberUpdated email.
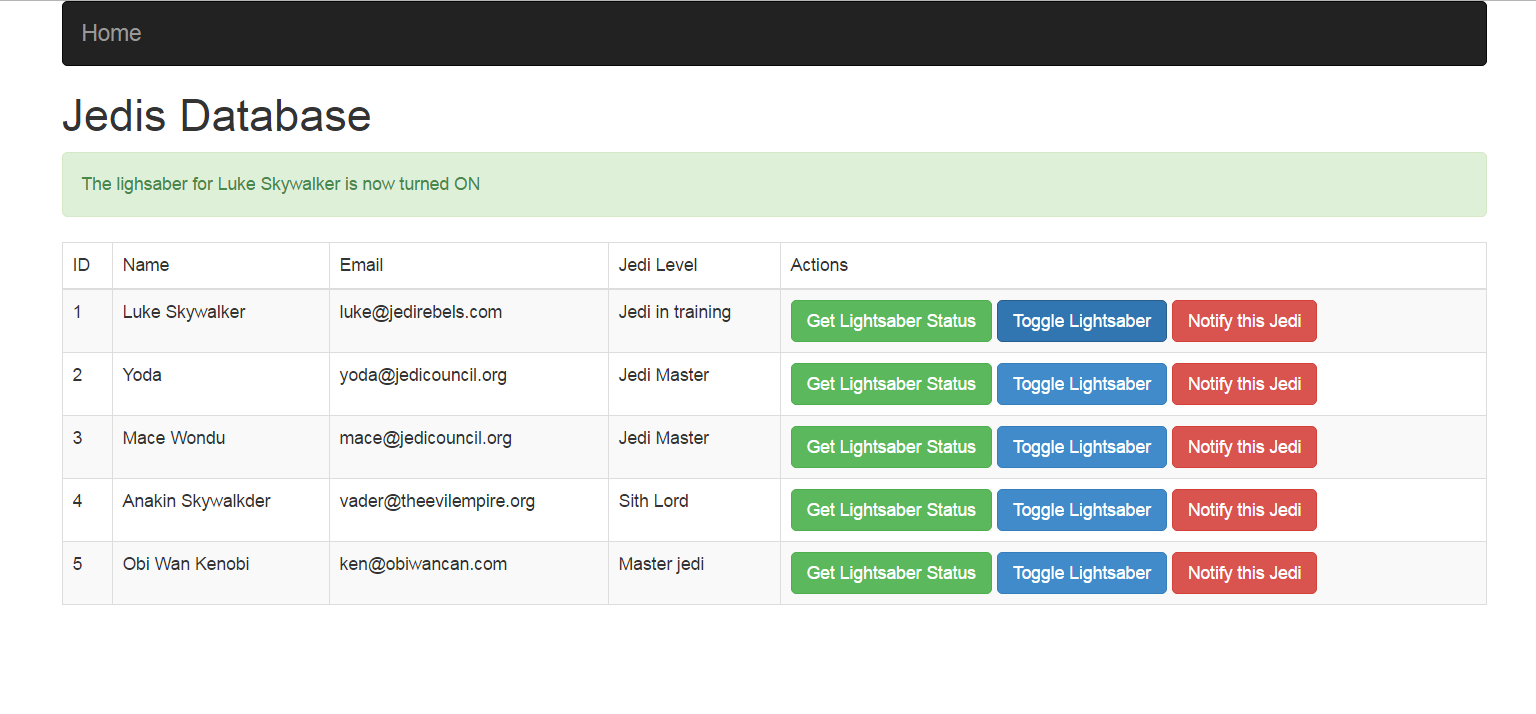
Here is what the interface looks like after clicking on the notify button for Luke Skywalker:

Here is what I get in mailtrap after clicking on the notify button for Luke Skywalker:

Now let’s head back to our mail message and actually define our message. You will notice that we have attributes like line() and action(). Line() basically creates a paragraph with the provided text while action creates a call to action button with the URL and text provided. In our case, we want to tell the jedi the status of their lightsaber and allow them to change the status of the lightsaber. What’s really cool about this system is that we do not worry about creating our view and filling it with the necessary HTML. It all comes pre-built and ready to go. However, if we want to modify the default template, we can do so and we will look at that later on. For the moment, let’s build our custom nofitification message to the jedis. The first thing that we want to do is setup the title of our application instead of the ‘Laravel’ title that we are currently seeing. This is defined right at the top of our app.php config file. I will change it to ‘Jedi Nofiticator’. Now the rest of the customizing can be handled in the notifier itself. Here is the newly updated toMail() method:
    public function toMail($notifiable)
    {
		$message = new MailMessage;
		if($this->jedi->is_lightsaber_on){
			$message->subject('Your Lightsaber is currently ON')
                    ->line('Hey '.$this->jedi->name.', your lightsaber is off so I guess that you are relaxing somewere. If you are in a fight and wish to turn on your lightsaber, click on the button below')
                    ->action('Turn On Ligthsaber', url('toggle',$this->jedi->id))
					->success();
		}else{
			$message->subject('Your Lightsaber is currently OFF')
                    ->line('Hey '.$this->jedi->name.', hope you are not in a fight because your lightsaber is currently off. If you wish to turn on your lightsaber, click on the button below')
                    ->action('Turn On Ligthsaber', url('toggle',$this->jedi->id))
					->error();

		}
		$message->line('Remember the rules: If you are in an actual fight, please turn on your lightsaber. Otherwise, keep it turned off!');


		return $message;
    }
We now create a message that is tailored to the status of the lightsaber. If the lightsaber is on, our email subject informs the jedi if their lightsaber is on. Our call to action button changes color because I add either the success() or error() attribute and the actual call to action allows the jedi to toggle their lightsaber status.


Modifying the Default E-mail template for notifications
That’s basically it for the notification itself. Now, lets look at customizing the notification email template. To do so, we will use artisan and the following command:
php artisan vendor:publish
Now, inside resources/views/vendor/notifications/email.blade.php is the template used for the noficiations . You can now edit this file to suit your needs. In our case, we will make a small adjustment to the template by changing the footer text from ‘All rights reserved.’ To ‘May the Force be with you’. Below is a screenshot of the email after the modification:

Mailable vs Notification
So now the question becomes “Should we use the mailable class or the Notification class?” I personally think that Laravel’s notification system is so much more powerful than the Mailable class. As your application grows and becomes more complex, you may need to send messages in various forms, other than emails to users. The notification class allows you to do this easily. Also, the mailables class does not include the very simple and straightforward message building system that the notification system comes with.


It turns out that for my LightsaberUpdated notification object, I do not have to pass the $user as an object to my constructor. Since it is the user that is initiating the notification, the object is stored under the $notifiable object. So, if I wanted access to the user’s email, I can do the following:
Nice article. I was wondering if you needed to pass the User in the constructor but then you made me feel very happy when I saw your comment pointing that out.